Natural light and custom touches can make any project feel extra special, and the same holds true when you build a gift tag made by stamp. By personalizing your tags with a unique “made by” design, you show recipients that every detail of their gift was crafted by hand with care. Whether you’re new to stamping or already have experience creating DIY crafts, this guide will help you design gift tags that feel personal, professional, and one-of-a-kind. In the process, you’ll learn how to choose the right stamp, gather materials, and apply finishing touches that reflect your style. Best of all, each tip is tailored for makers like you who love adding a creative spark to your gift-giving moments.
Celebrate the Magic of Handmade
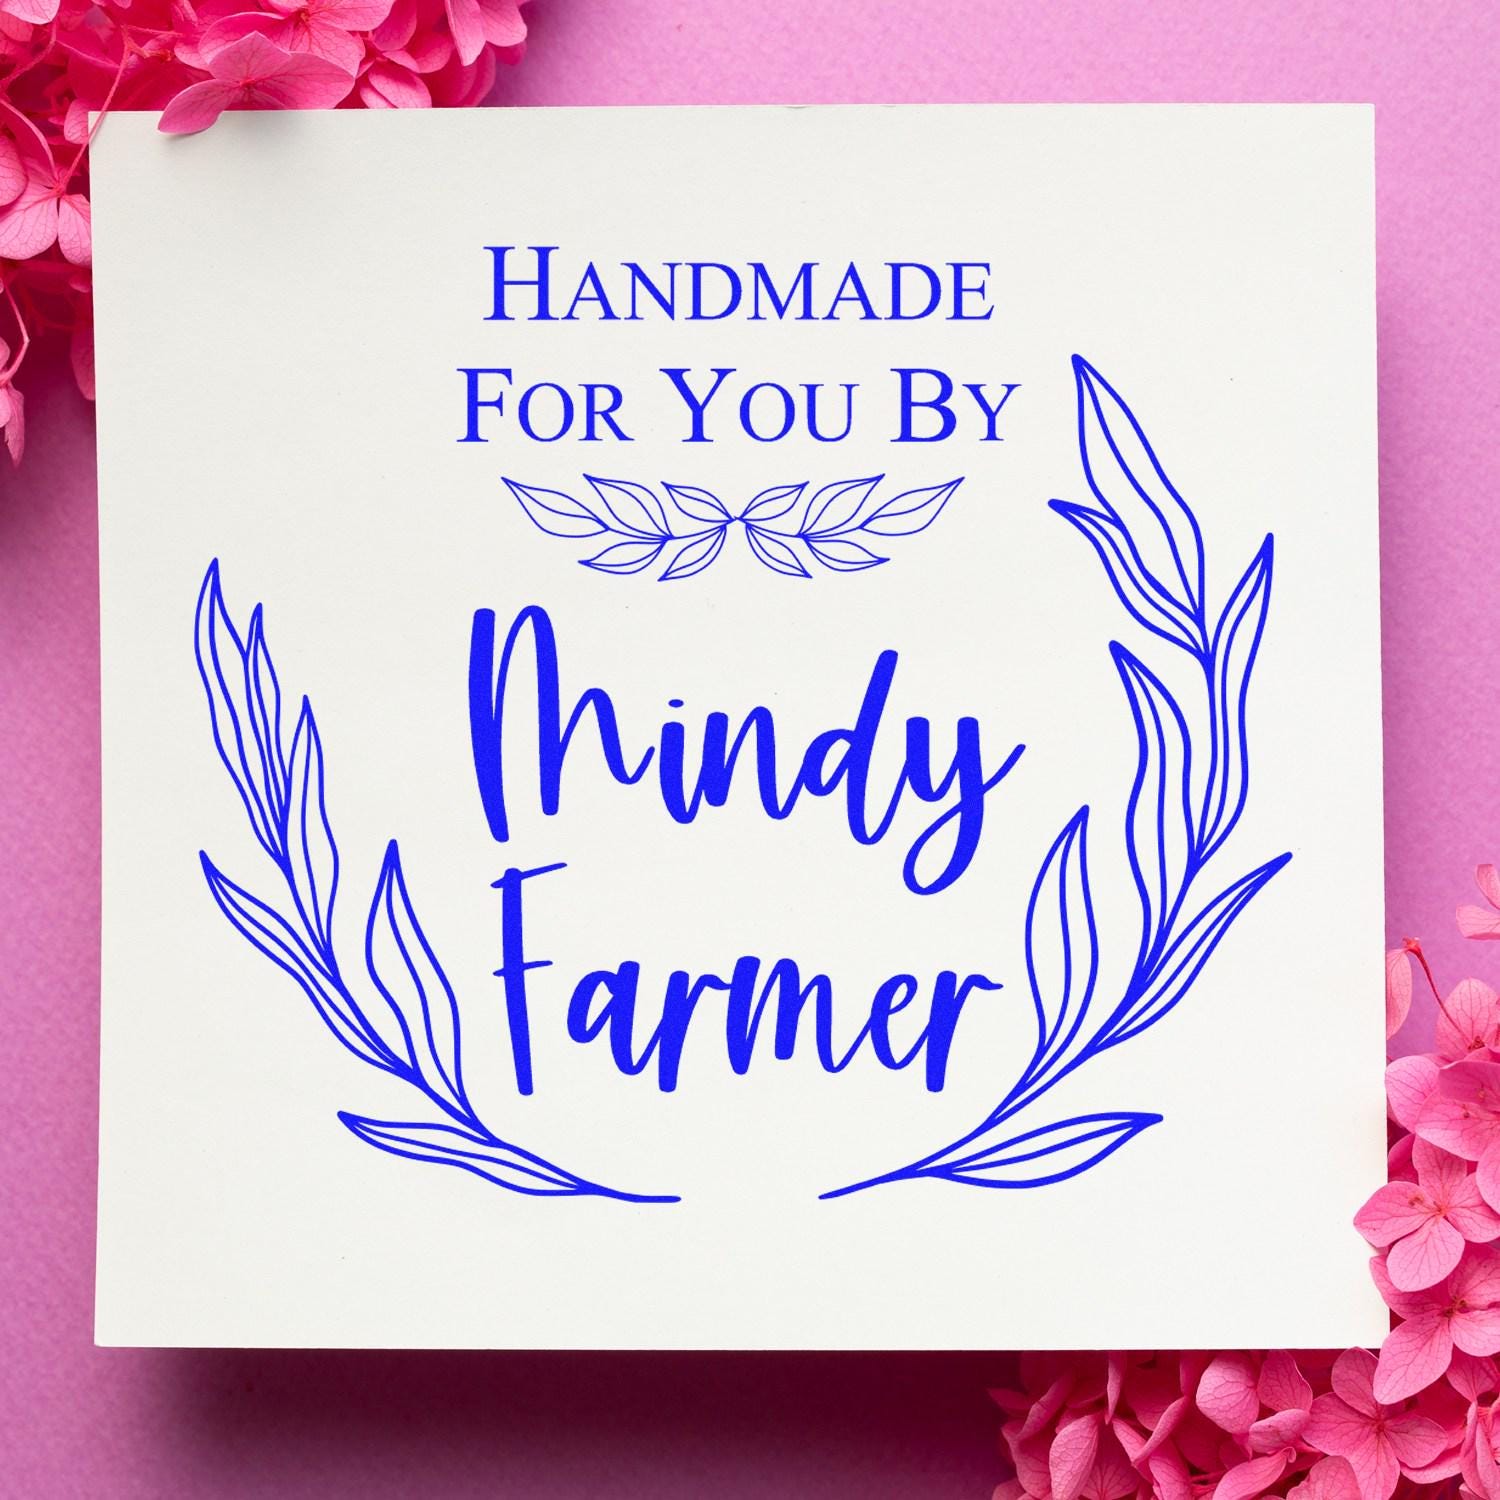
Handmade gift tags add charm and authenticity to your presents in a way mass-produced options simply can’t. Some of the most meaningful gifts you receive in life are those that display the giver’s unique personality. When you incorporate a “made by” stamp, you’re announcing that someone took the time to think carefully about every detail. A handcrafted tag serves as a mini canvas for your imagination. The crisp ink lines, playful colors, and textured paper can set the tone for the entire gift. You’re not just handing over a present, you’re handing over a story. Each tag becomes a small reflection of you, highlighting what you value and how you connect with the person receiving your gift.Below are just a few ways a gift tag made by stamp stands apart from ordinary store-bought tags:
- Adds a personal signature that looks neat and consistent.
- Conveys pride in your craft or product if you’re selling handmade wares.
- Looks great in social media photos or on craft fair tables.
Embracing handmade details doesn’t mean your creations have to be complicated or time-consuming. Something as simple as a beautifully inked “Made By” line can elevate even a basic tag. And if you’re the kind of person who loves variety, you can rotate through different stamp designs, inks, and papers to keep your projects fresh. From birthdays to anniversaries or even the upcoming holiday season, stamped gift tags can find a place in all your celebrations. You also have the freedom to experiment with creative accessories, like ribbons, metal charms, or small dried flowers. Each tweak transforms your tag into a tiny piece of art, making the recipient feel extra special before they even unwrap their present. Embrace the magic that happens when you take the time to add handmade details. As you’ll see, making your own gift tags is far from a chore, it’s a chance to delight in creativity and share that spark of joy with others.
Choose the Perfect Made By Stamp
Selecting the right “made by” stamp is crucial for ensuring your gift tags look polished. When you set aside time to think about design, size, and style, you end up with a tool you can use not only for gift tags but also for other surfaces, including packaging, postcards, and even clothing labels (if you opt for fabric-safe ink).Here are some considerations to help you choose a made by stamp that fits your unique style:
1. Stamp Shape and Size
- Round stamps often look classic and can center nicely on a small tag.
- Rectangular or square stamps give you more space for longer text or small graphics.
- Make sure to pick a stamp size that won’t overpower the tag itself. A balanced look helps keep your design from appearing cluttered.
2. Font Style and Personalization
- Cursive, serif, or sans serif? Each font style influences the overall mood of your gift tag. Cursive can appear elegant, while sans serif often feels modern or playful.
- Consider a logo-like stamp if you have a personal or business brand. This adds a professional flair to your tags and reminds recipients who crafted the gift.
3. Quality and Construction
- Rubber stamps are common, but photopolymer or polymer stamps also yield crisp impressions.
- Look for durability. If you plan to use the stamp frequently, you’ll want a sturdy handle and an imprint that can withstand multiple inking sessions without losing definition.
4. Versatility
- Check if you can customize the text. Maybe you want to include your full name, nickname, or small icons that represent your style or brand.
- Versatility matters if you plan to stamp more than just gift tags. With some creative inking techniques, you can adapt the same stamp for everything from wrapping paper to business cards.
When in doubt, try out a test design—some stamp providers offer digital previews before production. If you’re looking for a top supplier of custom-made seals and personalized embossers, Acorn Stamps has you covered. Family owned and operated since 1964, they bring over 60 years of service to every order. They’re known for stellar customer service and super fast turnaround times, so you can quickly see your vision come to life. A well-chosen made by stamp adds a personal flourish to your gift tags that recipients will cherish. Plus, think of the convenience of simply stamping the same design on all your products or gifts, creating a signature style that family and friends instantly recognize.
Gather Your Essential Tools
Crafting a gift tag made by stamp doesn’t require a huge investment in materials. In fact, you may already have many of the essentials at home. By assembling a toolkit of stamping must-haves, you’ll be able to whip up unique tags whenever inspiration strikes. Here’s a handy breakdown:
1. Stamping Tools
- Your chosen made by stamp: This is the focal point of your design.
- Ink pads in various colors: Classic black or brown inks are popular, but colored pads can make your tags pop. Opt for archival-quality ink if you want a crisp impression that won’t smudge easily.
2. Paper and Tag Bases
- Blank tags or cardstock: If you’re expecting heavier decoration, go for sturdier cardstock. Pre-cut tags—available in craft stores or online—save time on trimming.
- Scrapbook paper: Ideal for layering or adding accents. Pick patterns that contrast with your stamped text.
3. Cutting and Measuring Tools
- Scissors or a paper trimmer: Clean edges matter. A slight miscut might not seem like a big deal, but neat edges add to the professional look.
- Ruler or measuring mat: When working with multiple tags, consistent sizing makes your group of tags look polished as a set.
4. Adhesives and Embellishments
- Glue sticks, craft glue, or double-sided tape: Useful for adding decorative layers or attaching small embellishments.
- Ribbons, twine, or washi tape: Makes it easy to secure your tag to a bag or gift. Washed-out ribbons or pastel twine add a gentle, classy finish, while bold colors help your tag stand out.
5. Optional Extras
- Corner punch: Gives tags a distinct shape or curved edges.
- Eyelets or grommets: Adds a professional touch to the hole for the ribbon or string.
- Stickers, small wood shapes, or other dimensional add-ons: If you love mixed-media projects, these feel fun without overcrowding the design.
Having these tools in one place means you can start stamping whenever you want. Consider storing them in a container or drawer labeled especially for your gift-tag-making supplies. That way, you won’t waste time searching for your items and can jump right into the creative aspect.Also, make sure you dedicate a clean, flat surface free from dust or crumbs. Stamping is precision work, and a stray pencil shaving can lead to blotchy impressions. By organizing your workspace and supplies, you set yourself up for a smooth, enjoyable crafting experience.
Design a Memorable Gift Tag
Part of the allure of a gift tag made by stamp is its distinctive, personalized look. But if you want your creation to truly stand out, it helps to think thoughtfully about design choices, color palettes, and how different elements complement each other. While stamping remains the main focus, there are other steps you can take to ensure your gift tag looks as eye-catching as possible.
1. Balance Simplicity and Detail
- If your stamp includes decorative text or detailed flourishes, keep the rest of the tag simple with lighter background colors or minimal extra embellishments.
- If you’re using a straightforward font style, consider spicing up the design with small ornaments or borders around the edges.
2. Choose a Color Theme
- Matching or contrasting colors can shape the entire look of your tag. If your gift wrap or bag is pastel, try a vibrant ink color for the stamp so it pops.
- Coordinating your stamp ink with the color of ribbons or ties creates a cohesive theme.
3. Incorporate Layers and Textures
- Add dimension with gently layered cardstock shapes behind your stamped text. For example, place a smaller rectangle of patterned paper on top of the base tag layer.
- Adhering thin wood veneers, metallic stickers, or even pressed flowers can add a unique texture that sets your tags apart from store-bought options.
4. Experiment with Placement
- You don’t have to center your stamp. A diagonal or offset placement of your “Made By” text can create visual interest.
- Place your stamp near the bottom edge, leaving room at the top for a name or short personal note. This layout can work particularly well if you prefer symmetrical designs.
5. Test Before Committing
- Always do a couple of practice stamps on scrap paper. This ensures your ink is even and you know where to apply pressure for a crisp impression.
- Double-check spacing if you plan to add a personal note or an extra decorative element.
Designing your tag is a balancing act between showcasing your stamp and ensuring the overall aesthetic remains appealing. You don’t need advanced graphic design skills—simply trust your instincts, have fun, and focus on the layout that catches your eye. Over time, you’ll develop a personal style that others immediately recognize as yours.
Craft Your Tag Step by Step
Now that you know your tools and have a design in mind, it’s time to make your gift tag made by stamp. Below is a simple, foolproof process that works well for nearly any occasion, whether you’re celebrating a birthday, wedding, or product launch. Prepare Your Workspace
- Select a flat, clean surface. A desk or table works best—just make sure it’s well-lit so you can see every detail.
- Lay down a piece of scrap paper or a craft mat to protect against ink spills or adhesive drips.
Cut or Select Your Tag Base
- If using pre-cut blank tags, skip this step. Otherwise, measure your desired dimensions (for example, 2 inches by 3.5 inches), and cut the cardstock with scissors or a paper trimmer.
- Punch a hole at the top if you plan to attach a ribbon or string later.
Choose Your Ink Pad and Stamp Position
- Carefully ink your made by stamp. Tap the stamp gently on the ink pad, making sure every part of the design is evenly coated.
- Align the stamp on your tag. Some people find it easier to turn the tag upside down on the stamp, while others prefer pressing the stamp onto the tag. Use whichever approach gives you the cleanest imprint.
Press and Lift
- Place firm, even pressure on the stamp so the entire design transfers. Try not to rock the stamp side to side, as that can smear the ink.
- Lift the stamp straight up. This prevents smudging and maintains the clarity of the text or design.
Add Embellishments and Personal Notes
- Once the ink is dry, attach stickers, small cutouts, or other decorative accents if you want to further customize your tag.
- Write a short message or add the recipient’s name in a complementary pen color.
Thread Your Ribbon or Twine
- Cut a piece of ribbon, twine, or cord at least six to eight inches long so it’s easy to tie later.
- Thread it through the tag hole, then tie it in a small knot or bow.
Check Consistency
- If you’re making multiple tags at once, compare them side by side. Consistency can help your overall gift presentation look seamless.
- Mistakes or small ink smudges aren’t the end of the world. Imperfections often contribute to the handmade charm.
You’re done! Give your creation a quick once-over to ensure the stamp looks crisp, embellishments are securely attached, and your text is legible. Once everything is dry, your gift tag is ready to be placed on any present or craft project, proudly announcing your handiwork to the world.
Add Extra Creative Flourishes
After mastering the basic process of stamping your tag, you can take the design to the next level by adding unique decorative elements. Sometimes the smallest touches can transform a tag from simple to unforgettable. Here’s how to incorporate creative flourishes that make your gift tag stand out:
Hand-Lettering and Calligraphy
If you have a knack for lettering, consider adding a short dedication in calligraphy beneath your stamped “Made By” text. A graceful swirl or decorative script of the recipient’s name can bring an elegant feel. Even if you’re new to hand-lettering, you can practice a few basic strokes or use stencils for a neat finish.
Layering with Paper Cutouts
Add a pop of color by layering shapes such as hearts, flowers, or geometric forms on the corners. Use patterned scrapbook paper that complements the hue of your stamp ink. Secure them with glue, and align them in a way that frames your stamped message without obscuring it.
Touch of Nature
Nothing says handmade quite like real botanical elements. Small dried flowers or pressed leaves can look lovely on a gift tag, especially for weddings, baby showers, or holiday-themed packages. Secure them with a dab of craft glue or wrap them gently with metallic thread so they stay in place.
Metallic Accents
Metallic or glitter pens outline your stamped design, giving it a subtle shine that catches the eye. You can also experiment with metallic stickers shaped like stars or tiny dots to emulate confetti. If you’re feeling adventurous, try embossing powder in silver or gold. Simply ink your stamp with a sticky embossing pad, sprinkle the powder, and heat it to melt for a raised, shiny finish.
Personalized Messages or Small Photographs
Attach a mini photograph of you and the recipient on the back of the tag. This idea works exceptionally well for close friends or family, making your gift tag even more meaningful. You can also include a short message about the occasion or share a favorite quote that resonates with the recipient’s interests. When adding these extra touches, keep in mind the overall balance. You don’t want embellishments to overshadow your main stamped feature. Remember that a key advantage of your made by stamp is how it simplifies the production of multiple tags in a cohesive, recognizable format. Have fun exploring different craft mediums to add personal touches that complement your unique style.
Discover Versatile Tag Uses
A gift tag made by stamp doesn’t have to be limited to birthdays or holiday presents. These small, personalized tags can enhance a wide range of items and celebrations, giving them a more thoughtful, handcrafted feel. Below are just a few inspiring uses:
Add Branding to Handmade Goods
If you sell handmade items—be it handmade soap, jewelry, or baked goods—tying a stamped tag to your packaging instantly brands your product as professional, yet personal. Customers love connecting with the maker behind the product, and a “Made By” tag can foster that relationship in a subtle way.
Boost Party Décor
Hosting a wedding, bridal shower, or birthday party? Use stamped tags to label table place settings or to identify food and drinks on a buffet table. This approach not only looks organized but also shows your guests you went the extra mile to make them feel special.
Elevate Favor Bags
For events like baby showers, bachelorette parties, or corporate gatherings, add a stamped tag to small gift bags or boxes. Each guest leaves with a unique token of appreciation, complete with your signature stamp. It’s a simple way to add that personal flair people remember long after the event.
Organize Craft Rooms and Home Offices
Use the tags as functional labels for storage boxes, especially if you keep a lot of supplies. Instead of using a generic sticker label, you could stamp your “Made By” design, then write “Buttons,” “Glitter,” or “Envelopes.” It merges practicality with a bit of artistic fun.
Personalize Gift Baskets
When giving a gift basket filled with assorted goodies—like gourmet teas, candles, or skincare items—tie a custom tag around each smaller item. Recipients love seeing those extra thoughtful touches, and each decorated tag highlights the effort you put into assembling the basket. Don’t be afraid to get creative with how you incorporate your stamped tags. The flexibility is part of their appeal. Because they’re quick to produce, you can use them to label or decorate almost anything around your home, office, or event space. Over time, you might discover clever new opportunities to show off your stamping skills and spread your handmade charm.
Trust Acorn Stamps for Quality
Choosing the right stamp provider can make or break the appearance of your gift tags. After all, a crisp, clear imprint depends on a well-made stamp that won’t warp or degrade over time. If you’re looking for a brand that understands the importance of craftsmanship, check out Acorn Stamps. Here’s why they’re a go-to for makers who demand quality:
- Family Tradition Since 1964
As a family owned and operated business for over 60 years, Acorn Stamps carries a proud legacy of helping creators like you make their mark. This heritage translates into a personal enthusiasm for maintaining top-notch standards on every product.
- Stellar Customer Service
One of the biggest reasons crafters return to Acorn Stamps is their hands-on, supportive approach. Wondering which stamp size is right for your project? Need advice on ink colors or paper choices? You’ll find friendly guidance just a quick phone call or email away.
- Super Fast Turnaround
Time is vital, especially if you have a big event around the corner. Acorn Stamps prides itself on producing and shipping orders fast, so you won’t be left waiting. That means you can spend more time on the creative aspects of your project rather than stressing over delivery.
- Wide Range of Customization
At Acorn Stamps, you’re not limited to a predefined set of designs. From fonts and borders to logos and signatures, they’ll help you craft a “Made By” stamp that perfectly reflects your style. Customize everything down to the smallest detail.
- Durable Materials
Whether you’re stamping hundreds of tags or just a few for personal gifts, you need a stamp that holds up to repeated use. Acorn Stamps employs robust materials and quality craftsmanship, ensuring a clean, professional imprint each time.
- Personalized Embossers and Seals
Gift tags aren’t the only area where you can show off a personal touch. Acorn Stamps also offers custom-made seals and personalized embossers that elevate stationery, envelopes, and packaging. This versatility lets you maintain a consistent look across all your branded materials. When you shop with Acorn Stamps, you’re getting more than just a product—you’re partnering with folks who value creativity and understand the needs of dedicated makers. Their commitment to excellence at every step, from design consultation to final shipping, means you can trust each piece of your order will contribute to a signature, polished look.
Frequently Asked Questions
Can I Use Any Ink Pad With a Made By Stamp?
Absolutely. You can experiment with different ink pads to achieve color variations. Just make sure the ink is compatible with the surface you’re stamping on. For papercraft, a typical water-based dye ink or pigment ink works well. If you’re looking to stamp on fabrics, opt for fabric-safe inks that won’t wash out.
How Do I Clean and Maintain My Stamp?
Gently wipe your stamp on a damp cloth or use a specialized stamp cleaner. Avoid scrubbing the rubber or polymer material too aggressively. Proper cleaning after each use helps preserve the clarity of the design and ensures the stamp remains in good condition for future projects.
Are There Specific Paper Types Best for Stamping?
Any sturdy, porous paper will typically handle stamp ink well. Cardstock is often a top choice due to its thickness, but heavyweight printer paper can also work in a pinch. Additionally, tags made from kraft paper lend a rustic vibe, while smooth, coated papers provide a more refined, modern look.
What If My Stamp Impression Looks Blotchy or Faded?
If your impression isn’t clear, try re-inking the stamp and verify you’re pressing evenly across its surface. Blotchy images can result from uneven pressure or an over-inked pad. Faded images might indicate you need a fresh ink pad or you’re not pressing the stamp firmly enough onto the paper.
Can I Use My Made By Stamp on Non-Paper Surfaces?
Yes, as long as you have the right kind of ink. You can stamp on wood, fabric, or even some plastics. However, you’ll want to test a small area first to ensure the ink adheres and doesn’t smear. Specialty inks are often required for surfaces like glass or ceramic. Crafting a gift tag made by stamp combines practicality, creativity, and a personal touch that makes your gifts feel genuinely unique. By choosing high-quality materials and a reputable supplier like Acorn Stamps, you can achieve crisp, custom markings that reflect who you are as a maker. Whether you plan to stamp a single tag for a treasured friend or churn out dozens for a craft fair, these small touches speak volumes about the heart behind your creations. Happy stamping!