Are you looking for a creative way to enhance the look of your gifts? One easy and fun approach is packaging made by stamp. With just a personalized stamp and a bit of your own flair, you can transform everyday boxes, bags, or paper into something truly distinctive. Whether you’re a small business owner, a dedicated crafter, or simply a thoughtful gift-giver, stamping lets you add personality that recipients will instantly notice. And thanks to modern customization options, you can design a stamp that captures your style. Read on to discover how packaging made by stamp can elevate any present, and learn expert tips to kick-start your own stamping journey.
Start With a Clear Vision
Before you grab your supplies, it helps to define your goals for your stamped packaging. Ask yourself: What vibe or message are you hoping to send? For some, it’s a heartwarming, handmade feel — for others, it might be fun and modern. When you have a clear vision, you’ll naturally align design ideas, color palettes, and finishing touches to fit that concept.
- If you’re packaging a holiday gift, you could incorporate festive symbols like snowflakes or a simple message such as “Happy Holidays!”
- If your brand or shop has a logo, consider ordering a custom stamp with that design to reinforce brand recognition.
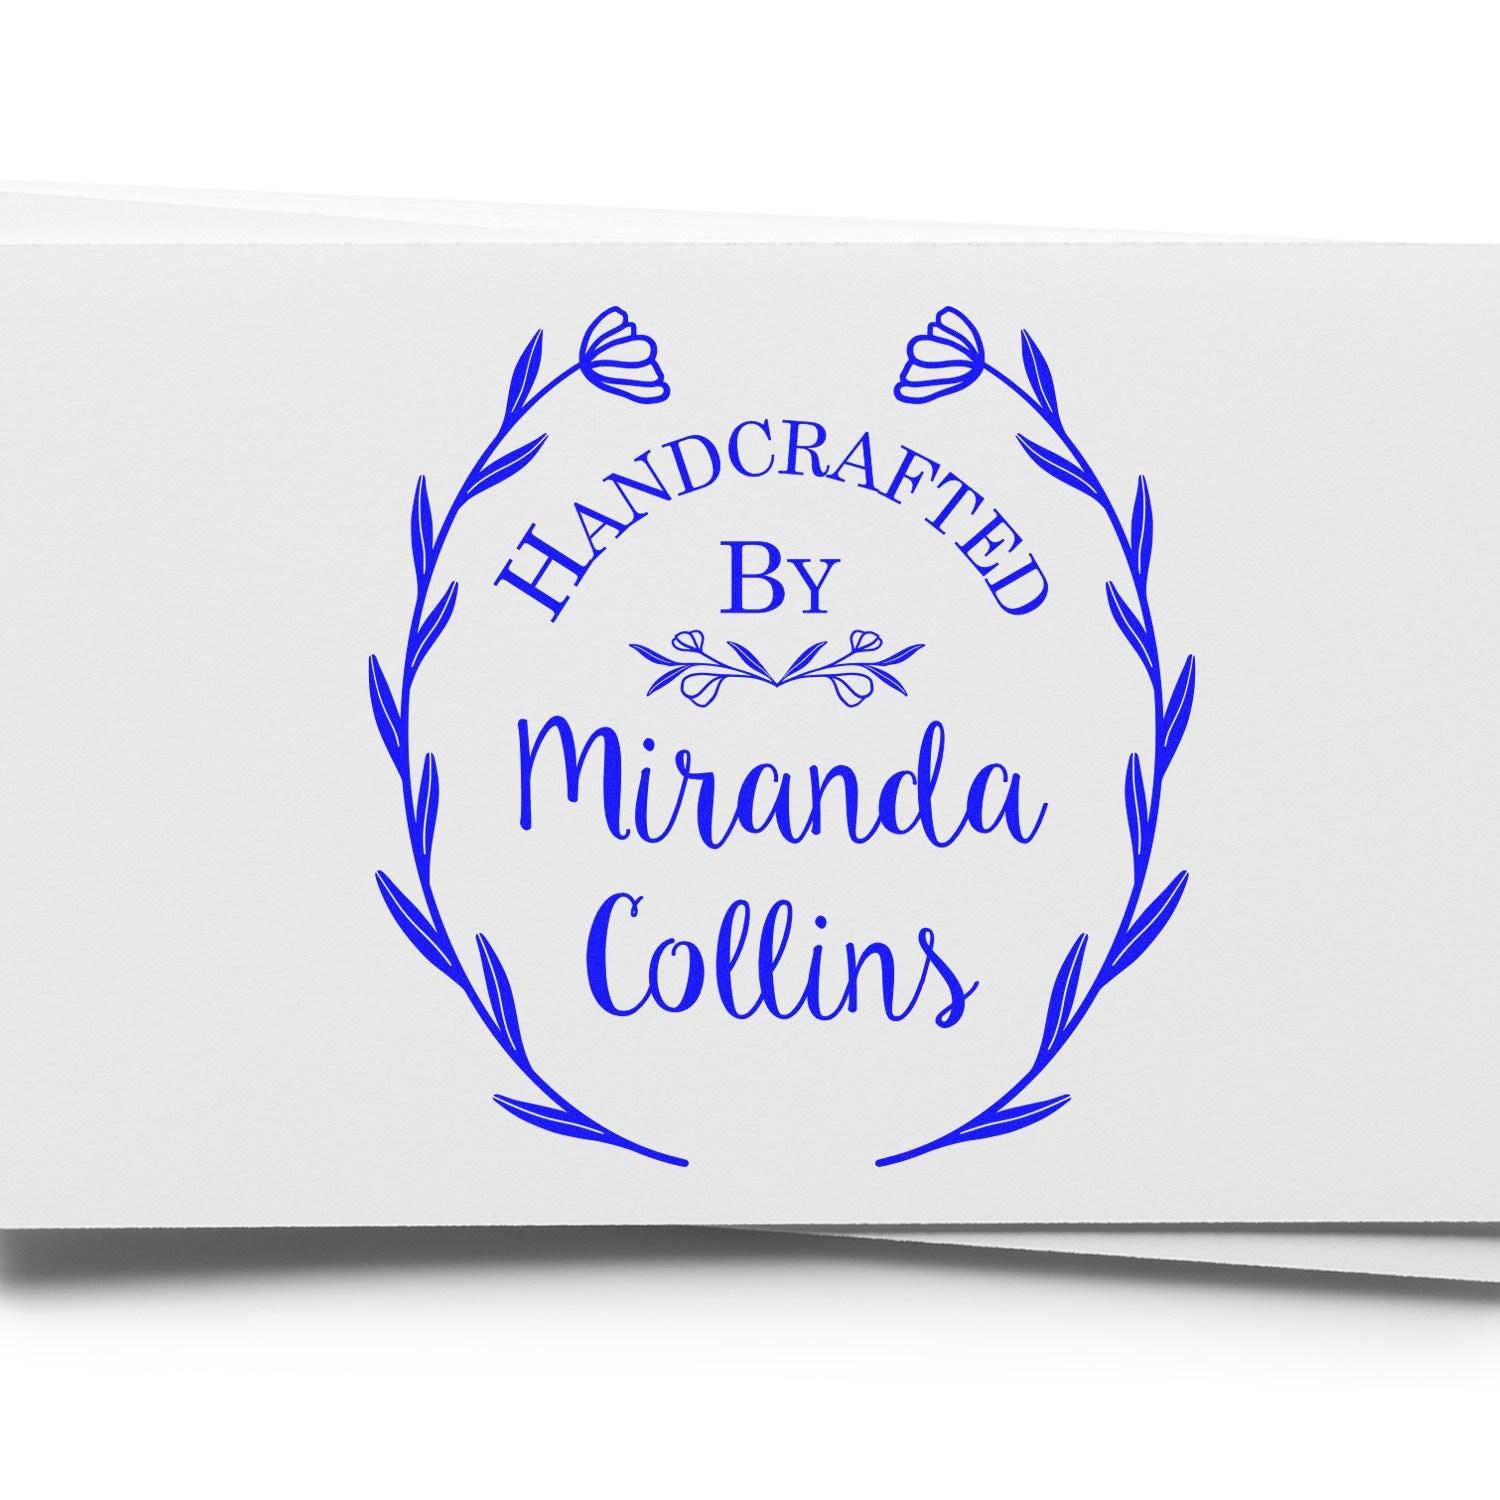
- For personal gifts, you might want your name or a special monogram, perhaps “Made By [Your Name],” right on the packaging.
Let your intention guide each decision, from the type of stamp you choose to the ink colors you select.
Choose Your Stamp Type
Next, explore the stamp styles that will best suit your project needs. Modern stamping has come a long way, and there are plenty of options to fit every taste.
Rubber Stamps
Traditional rubber stamps remain a favorite choice for both personal and professional packaging. They’re durable, long-lasting, and capable of fine details. Many people like rubber stamps for their classic look, especially if you’re aiming for rustic or vintage vibes.
Self-Inking Stamps
If you need to stamp multiple packages quickly, self-inking stamps can be convenient. They come with a built-in ink pad, saving you time and effort. You just push down and the impression is made. They’re highly useful for businesses or those who like batch-stamping sessions.
Embossing Stamps
Embossing stamps use a separate powder and heat tool to create a raised effect on paper. These are perfect if you want sophisticated packaging that quite literally stands out. They add texture, making your gift wraps or boxes feel professionally finished.
Team Up With Acorn Stamps
The next stage is deciding who will create your custom stamp. If you’re looking for a dependable partner in this process, consider Acorn Stamps. Family owned and operated since 1964, Acorn Stamps has spent the last 60 years perfecting the art of custom seals, personalized embossers, and, of course, stamps. They’re known for:
- Stellar customer service
- Super fast turnaround
- Attention to fine details
Because they specialize in custom-made stamps and embossers, their expertise ensures you’ll get a high-quality product the first time around. Whether you’re designing a new logo or personal signature, Acorn Stamps can guide you from concept to completion with ease.
Create Your Signature Design
People love receiving gifts that are personalized — it tells them you put extra thought into the presentation. Here’s where your design process comes in. Whether you’re working with a professional or tinkering on your own, remember the following steps:
- Brainstorm: Make a messy list of ideas or sketch them out on scrap paper. Then narrow down the ones you truly love.
- Refine: Pick one concept and polish the shapes, lines, and text. Crop or resize if necessary so it’s not overly intricate.
- Digitize (if needed): If your artwork is handmade, you can scan it or snap a clear photo. This image helps the stamp maker convert your design into a sturdy, workable template.
Aim for a design that is memorable yet not too busy. Fine lines can blur, while large blocks of solid color can appear blotchy if you’re not careful with inking. Keep a balance so that every detail remains visible after stamping.
Embrace Color Psychology
Packaging made by stamp doesn’t necessarily mean using only black ink. Color can play a key role in how your recipients perceive your gifts. Plus, selecting ink colors you love is part of the creative fun.
- Vibrant Reds: Bring energy, excitement, and passion to your packaging. Ideal for Valentine’s Day gifts or any time you want bold flair.
- Cool Blues: Add a soothing and calm appearance. This works well for baby showers, spa-themed gifts, or cozy celebrations.
- Soft Pastels: Convey a gentle, warm feeling, perfect for springtime gifts or heartfelt tokens of appreciation.
- Metallic Hues: Step up your visual game with gold, silver, or copper stamping ink. Metallic accents immediately read “luxury” and “special occasion.”
Combine your chosen color(s) with the right packaging material. For instance, silver ink on a dark blue box looks sleek, while a gold stamp on a kraft paper bag gives a rustic but upscale feel.
Select the Right Packaging Materials
While the focal point is your stamp, the type of packaging you select has a major impact on the final look.
- Kraft Paper or Boxes: Offer a “down-to-earth” impression, pairing nicely with earthy tones or metallic ink.
- Glossy Gift Bags: Reflect light, which can make stamping more difficult. It helps to test your ink’s drying time to avoid smudges.
- Wrapping Paper: Thin paper can warp if you apply too much ink or pressure, so experiment first on a corner piece.
- Fabric or Muslin Bags: Also popular for rustic or eco-friendly packaging. Choose an ink specifically designed for fabric if needed.
Be sure to test your newly created stamp on scraps or leftover materials. This approach lets you confirm how the ink adheres and helps you fine-tune your technique. Adjust your pressure, the amount of ink, or even your placement until it looks just right.
Practice Your Stamping Technique
It may seem straightforward — just press the stamp into ink, then onto the surface — but a little finesse can ensure consistent, crisp impressions.
- Lightly Tap the Ink Pad
You don’t need to press aggressively. A gentle, even tap is usually enough to coat the stamp. If you push too hard, you risk soaking the stamp and getting blotches of excess ink.
- Test on Scrap Paper
Always do a few practice stamps before working on the actual box or bag. It helps you see if you have enough ink coverage.
- Steady Your Pressure
Apply firm, even pressure with both hands. Avoid rocking the stamp or pressing only on one side. Lift it straight up to prevent smearing or double images.
- Re-Ink Regularly
For multiple pieces, re-ink after every impression or every other impression. If the stamp is producing a faded look or missing sections, it’s time for a fresh coat of ink. If you’re stamping on a curved surface like a jar or cylindrical container, you might want to “roll” the stamp from one side to the other, ensuring mint coverage across the curve.
Add Embellishments and Layers
Your stamp design can absolutely shine on its own, but if you’d like to further dress up the packaging, consider creative embellishments:
- Ribbons and Twine: A bit of satin ribbon or rustic jute twine can instantly transform any bag or box into a gift-worthy package. Coordinate the color with your ink to keep the look cohesive.
- Handwritten Elements: If you’ve got neat handwriting or calligraphy skills, consider adding the recipient’s name. Balance your text so it complements your stamped design.
- Stickers or Wax Seals: If you want to close a bag or envelope with style, a wax seal
(featuring the same design or a monogram) adds a traditional charm. Stickers also work great for a fun, playful vibe.
- Small Accents: Glitter, decorative tape, or pressed flowers can ensure your packaging stands out. Just keep it aligned with your overall theme so you don’t overshadow the stamped details.
Layer these extras on gently. Too many additions can feel cluttered and might upstage your carefully chosen stamp.
Transform Gifting Into Branding
If you run a small business or regularly send out packages, stamping is more than an artistic pursuit — it doubles as a branding strategy. A consistent stamp, especially if it features your logo or tagline, can reinforce brand recognition.
- Use a distinctive color combination that’s synonymous with your brand.
- Stamping small phrases like “Made With Love,” “Packed With Care,” or “Handmade Just for You” can infuse personality onto shipping boxes, envelopes, or tissue paper.
- Add your web address or social media handle if you’d like recipients to connect with you online.
Take advantage of a “packaging made by stamp” approach to build brand loyalty. It’s a quick and low-cost shortcut that ties all your materials together and helps you stand out in a sea of standard shipping boxes.
Celebrate Milestones and Holidays
Another perk of stamping is how easily you can replicate a theme across multiple gifts, no matter the season or celebration:
- Birthdays: Customize your stamp for an annual birthday bash. You can even include the honoree’s name in a whimsical font.
- Weddings: If you’re putting together wedding favors, unify the entire aesthetic by stamping the couple’s initials or wedding date on the favor boxes.
- Anniversaries: Personalizing gift wraps or goodie bags with the year of anniversary is a graceful way to add that “special occasion” feel.
- Seasonal Events: Snowflakes for the winter holidays, florals in spring, pumpkins in fall. Seasonal details make your gifts look on-theme and thoughtful.
For crafters who love making each gift an occasion, the possibilities are endless. By mixing up different designs or simply switching ink colors, you can celebrate new themes without having to invest in a whole range of packaging supplies each time.
Experiment With DIY Stamp-Making
While you can certainly order a top-quality custom stamp from Acorn Stamps, you might also enjoy dabbling in a little stamp-making if you have the time. Simple carve-your-own kits exist for crafters who want to give a handmade impression to their packaging. Typical kits include a carving tool, a piece of rubber or linoleum, and an ink pad. The process involves:
- Sketching your design on the rubber.
- Carefully carving away the negative space (the areas you do not want to ink).
- Testing your carved stamp on paper and refining as needed.
DIY stamps might be slightly rougher around the edges, which gives them a lovely homespun look. If you do go this route, carve slowly and safely, preferably on a non-slip surface. Keep in mind that detailed or intricate logos often require a professional approach.
Prepare for Bulk Stamping
Packaging made by stamp becomes even more practical when you have multiple boxes or bags to mark in one sitting. Here’s how to efficiently handle bigger stamping jobs:
- Set Up an Assembly Line
Line up all your blank packaging items on a large table. Keep your stamp, ink pad, and any additional supplies in easy reach.
- Group Items by Stamp Design
If you use more than one stamp (for instance, one for your logo and another for a decorative accent), stamp all of one design first before switching over to the next. This helps maintain a consistent application.
- Refresh Your Ink Pad
More stamping means extra visits to the ink pad. Ensure the ink surface doesn’t dry out. If your pad becomes too dry, it can cause faded or spotty impressions.
- Let Everything Dry
Give each stamped item a few minutes to dry fully before stacking or packaging to avoid smudges. For heat embossing or metallic inks, allow extra time.
- Inspect and Touch Up
If you see any partially missed letters or areas where it’s too light, consider doing quick touch-ups. Some people use a fine-tip marker to fill in gaps, though perfecting your stamping pressure can reduce the need for corrective measures. Once you’ve established a smooth routine, packaging multiple gifts or products can be accomplished surprisingly fast. You’ll wind up with consistent, on-brand results, all while preserving that charming handmade appeal.
Enjoy the Benefits of Custom Embossers
In addition to stamps, custom embossers from Acorn Stamps can bring even more texture and class to your packaging. While an embosser doesn’t use ink, it creates a raised impression on your paper or cardstock. This subtle detail looks professional and can enhance:
- Stationery or envelopes
- Hang tags or product labels
- Certificates or formal documents
Embossers can be especially beneficial for wedding invitations and high-end marketing materials. Just remember that certain papers and thicknesses work better with embossing. Thick cardstock often produces the sharpest raised effect. If you’re unsure, request samples or test on smaller scraps to see if you like the final look.
Tap Into Eco-Friendly Options
If sustainability is important to you, stamps offer a wonderful solution. By using biodegradable or recycled materials — from kraft paper to compostable twine — and a single reusable stamp, you reduce your carbon footprint. Some tips for eco-conscious stamping:
- Choose water-based, non-toxic inks that are safer for you and the planet.
- Reuse cardboard boxes or paper bags by covering old logos or text with a single paint color, then stamping anew.
- Explore biodegradable glitters if you’d like a sparkly accent that doesn’t harm the environment.
- Upcycle scraps of cloth or ribbon for finishing touches.
Combining creativity with eco-friendly practices results in gift packaging you can feel proud of, and it resonates with recipients who appreciate sustainability.
Spread Joy With Handmade Details
One of the greatest joys in giving a gift is the emotion it evokes. Custom stamped packaging amplifies that sense of delight and thoughtfulness. By showing that you invested time and imagination into the wrapping, you’re sending a message of genuine care.
- Recipients may even keep or display your uniquely stamped box or bag as inspiration for their own crafting.
- If you’re selling products, customers tend to remember small personal touches, which can boost repeat sales and positive reviews.
- For personal celebrations, that extra layer of craftsmanship might become something friends look forward to each time you give a present.
Whether you’re stamping for business branding, personal creativity, or a combination of both, the end result is equally rewarding: distinctive, memorable packaging that stands out in a world of mass-produced items.
Encourage Friends and Family to Join
Stamping is an activity that can easily become a group effort. If you’re hosting a gathering or workshop, setting up a stamp station lets everyone personalize their own packaging. It’s a fun, engaging way to bond. For instance:
- At a bridal shower, each guest can decorate favor bags with a shared design or monogram.
- During a children’s birthday party, kids can decorate their own goody bags. Provide multiple stamp designs, crayons, or stickers for extra flair.
- For small business networking events, participants can get hands-on experience customizing product packaging. Offer various stamps showcasing different design themes.
By letting others participate, you’ll spark creative conversations and help them see how easy it is to add character to an otherwise mundane box or bag.
FAQs: Your Common Questions Answered
Below are answers to some frequently asked questions about packaging made by stamp and custom stamping in general.
Why Use Personalized “Made By” Stamps for Packaging?
Personalizing your packaging with a “made by” stamp adds a heartfelt touch and showcases the maker behind each gift or product. Recipients or customers immediately sense the care that went into creating and preparing their item. It’s also a subtle but effective way to reinforce your personal brand or identity.
Can I Use Multiple Ink Types for Different Surfaces?
Absolutely. Different surfaces often need different ink formulas. If you’re stamping on non-porous material like plastic or glossy paper, look for inks specifically labeled for non-absorbent surfaces. For fabric, go with a fabric-safe ink that won’t wash out. Some general-purpose inks can work well on most paper products but may require testing on unique materials.
How Do I Care for My Custom Stamps?
Caring for your stamps involves gentle cleaning and proper storage. After each stamping session, briefly wipe your stamp with a damp cloth or stamp cleaner to remove residual ink. Let it air dry before placing it in a cool, dry area, away from direct sunlight. Avoid scrubbing with harsh brushes, which could damage the rubber surface, and keep your stamp out of extreme temperatures to extend its lifespan.
Can I Incorporate Color or Metallics Into My Stamped Design?
Yes. You can use colored ink pads or add metallic accents for a bolder statement. Many brands offer specialty inks, like gold or silver, which stand out against darker packaging. If you need even more shimmer, consider finishing your design with a light dusting of embossing powder in metallic hues, then applying heat to set the raised sparkle.
What Sets Acorn Stamps Apart From Other Suppliers?
Acorn Stamps’s rich 60-year history shows they’ve honed their craft to perfection. As a family-owned and operated business, they focus on building and maintaining personal connections with customers. Their stellar customer service means they’ll guide you through design, handle questions with care, and ensure you get your stamp quickly thanks to their super fast turnaround. The result is a custom stamp or embosser that meets — and often exceeds — your expectations. By exploring these frequently asked questions, you’ll be better prepared and more confident in adding that extra personal touch to every gift or package.Overall, packaging made by stamp is a budget-friendly and captivating way to transform ordinary materials into cherished keepsakes. Whether you’re brand-new to stamping or already a seasoned crafter, the possibilities are nearly endless. You might stamp a single icon on a humble gift tag or blanket a box with intricate patterns to build anticipation before the recipient even sees what’s inside. It’s all about making your mark — quite literally — so the gifts you share (or sell) become delightful highlights of someone’s day. And when you partner with a reliable supplier like Acorn Stamps, you can trust that each impression reflects your originality and care. Give it a try, and watch how a little stamping magic can turn simple packaging into something truly memorable.